Did you know that Simcenter STAR-CCM+ has some built-in predefined geometrical shapes that you can use to jump start your simulation? In this blog post we will highlight some of these quick steps for geometry creation to help you become even more efficient in the software.
Quick geometry creation in 3D-CAD
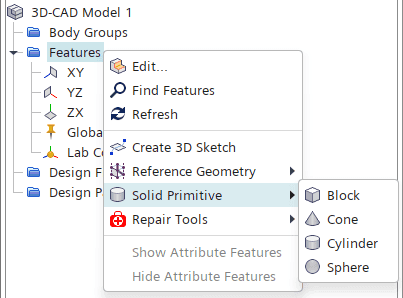
As most readers are probably aware at this point, the 3D-CAD module in Simcenter STAR-CCM+ allows you to either import or sketch and build geometry from scratch, much similar to any given CAD software. But sometimes you just want to create something very simple and standardized, and then there is a shortcut. Let us present the Solid Primitives. Found by right-clicking the Features folder in the CAD tree, the Solid Primitive selection allows you to quickly create a block, a cone, a cylinder or a sphere instantly, without the need for a sketch and any following geometrical operation.
Let’s look at an example where we create a block. Either we know exactly what length, width, height and position we want our block to have and then we can simply state our dimensions in the input fields (seen in the upper left corner of the picture below). Alternatively, we can just push and pull the arrows in the scene, to create a more arbitrary shape of our liking.

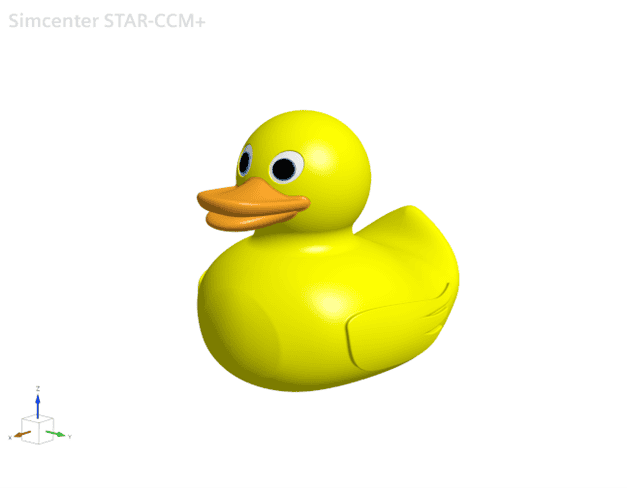
Another useful feature to know about is the Create Bounding Bodies operation. Many times, creating a fluid volume is a matter of creating a void from the CAD solids in a surrounding volume. In a case where this surrounding fluid is not well defined, a simple way to make sure we enclose all our solids is to use the Create Bounding Bodies feature. Let’s take a look at an example with our beloved rubber duck.
Let’s assume we want to enclose the duck with a fluid volume. We could of course create a solid primitive, but let’s say we would want the enclosing fluid to snap to the extents of the rubber duck. Then we can use the Create Bounding Bodies feature instead, found inside the Body Features (or Body Group Features), as seen below.

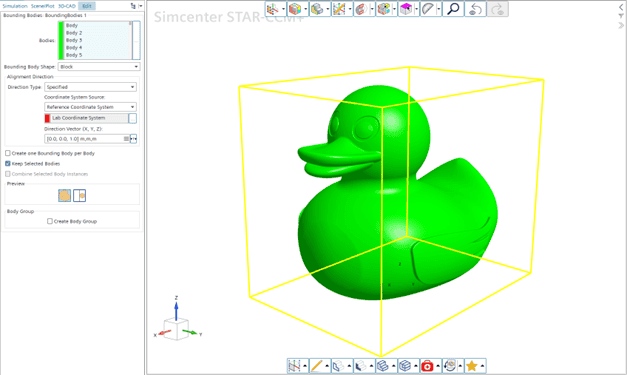
There are some alternatives to consider when using this feature, as depicted below. First, we obviously need to select what bodies we want to enclose (1). Next, we have the option to create either a bounding block, or a bounding cylinder (2). Next, we can choose whether to create a bounding body for each input body, or a single bounding body to enclose all in one (3). And finally, we can select whether we want to keep the ingoing bodies or let them merge with the bounding bodies (4).

The picture above shows a preview of the option with bounding bodies for each ingoing body. Below is a depiction of an example with a single bounding body for every ingoing body instead.
The resulting domain for such an operation would look like this, where you can see that the box extent coincides with the maximum coordinates of the rubber duck in each direction. From this point, we could for example use an Extend Solid operation to expand the bounding box further away from the duck.

Quick geometry creation in STAR-CCM+ main GUI
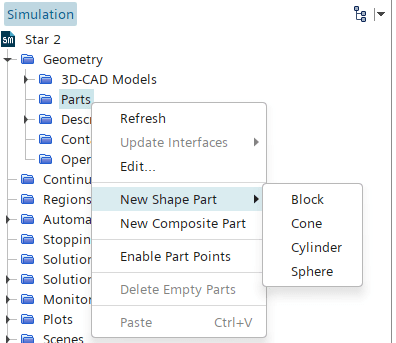
Inside the STAR-CCM+ main GUI you have similar possibilities as above. To quickly create predefined geometries, you can right-click the Parts folder inside the Geometry node and select New Shape Part. Similar to Solid Primitives in 3D-CAD, you here have the possibility to create a block, a cone, a cylinder or a sphere.
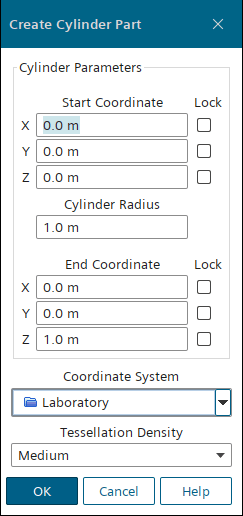
Looking at an example for a new cylinder, the input dialogue window would look like below:
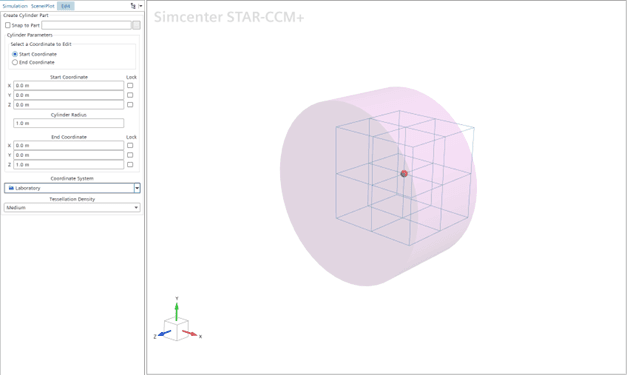
The creation could also be a bit more interactive in case you would have a scene open when creating the shape part. That would instead give you an input dialogue similar to this:
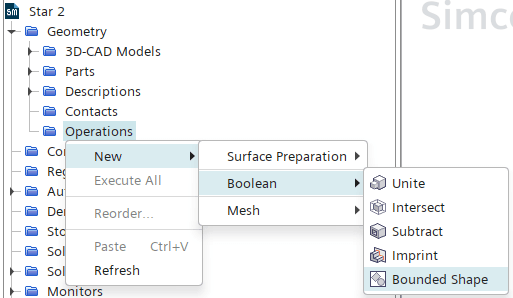
Creating bounding bodies is possible also in the STAR-CCM+ main GUI. In this case it is treated as a Boolean operation and can therefore be found inside the geometry operations folder, as depicted below.
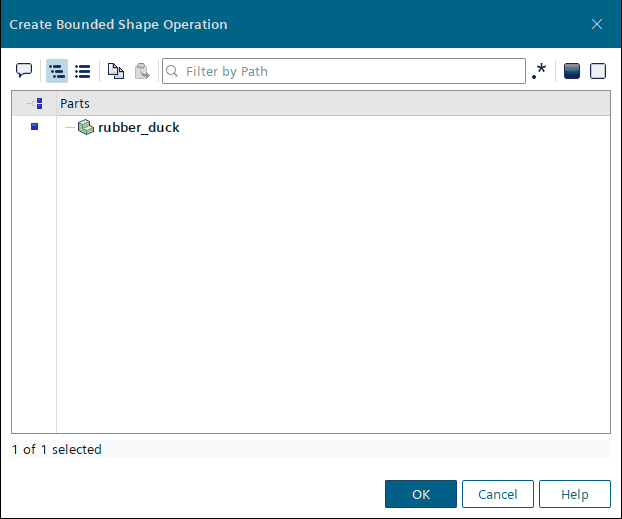
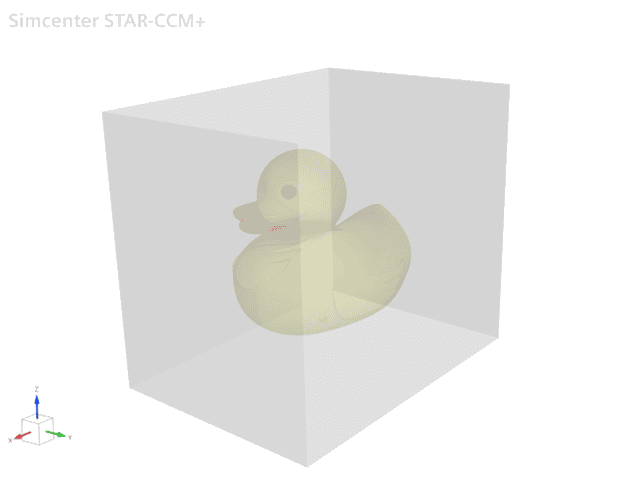
In this example, we want to create a bounding shape around our rubber duck again, which we have imported as a part. The dialogue window would then look like this:
Now, we could have had several ingoing parts (similar to before), and then we would have had the option to create a bounding shape for each individual part, just as in 3D-CAD. But in this case we will create just one bounding shape since we treat the entire duck as one part.
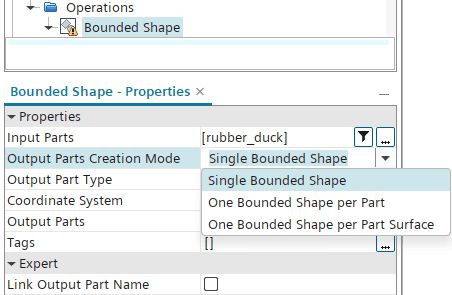
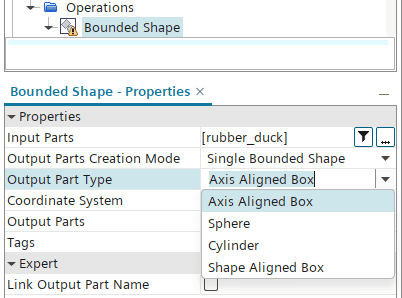
Similar to 3D-CAD, there are also a few options when it comes to the shape of the bounding body, see below.
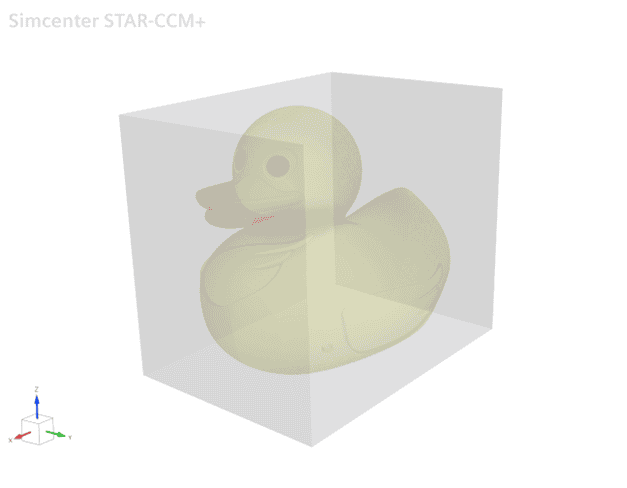
Now we can execute the operation and get a bounding box similar to the one in 3D-CAD:
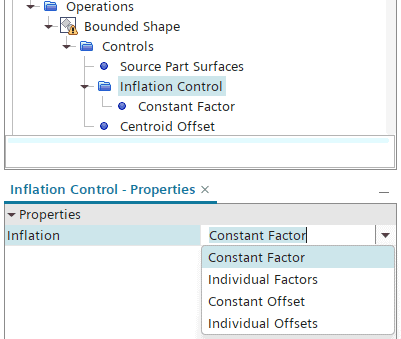
Worth mentioning is that the Bounded shape Boolean operation in the main GUI has some additional controls that can come in handy as well, see below.
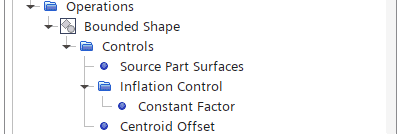
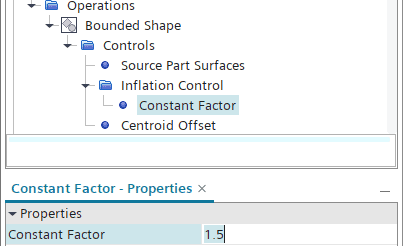
For example, using the Inflation Control, you can instantly scale the enclosing body directly inside the Boolean operation. Let’s say we want to make the bounding box 50% larger than the extents of the rubber duck, then we simply put a factor of 1.5 in the Inflation Control like below.
This would then give us a bounding shape that looks like this instead:
You could also use specified offsets (rather than scale factors) and also enlarge the bounding shape differently in different directions.
I hope these features can come in handy when preparing your geometries in Simcenter STAR-CCM+. As always, you are welcome to send in any questions to support@volupe.com.
Author

Johan Bernander, M.Sc.