This week at the Volupe blog we will look into animations within Simcenter FloEFD. There are several ways of visualizing calculated data, but when running transient simulations – what is more informative than watching an animation?
Summary of blog post
- Create animations of the results from your simulation in two different ways.
- Record your screen in Simcenter FloEFD.
- Use the built in tool “transient explorer” which creates smooth animation with interpolation, based on automated workflow (my preferred way of animations).
- Set up aminations based on data calculated from specific time steps (without interpolation).
- Watching the animations, understand the importance of fixed color bar values, to not get jumps in colors from a time step to another.
Which type or results to save
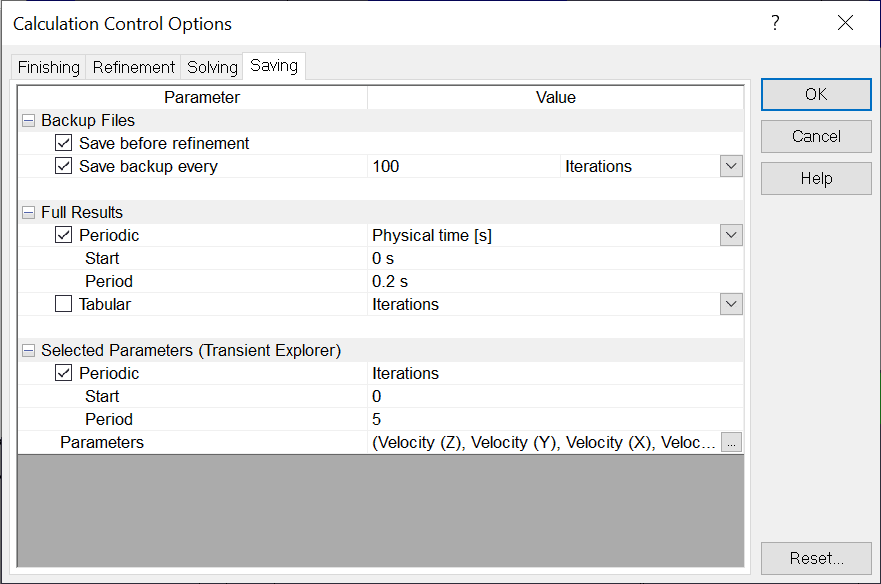
When you are running transient simulations in Simcenter FloEFD you can save your data as full results or selected parameters. In the calculation control options window, see the picture below, you can set how often you want to save data during a transient simulation, this you do in the tab saving.
- Saving full results will save a result file, for each specified period, for all data calculated in that time step. This can result in quite much data being stored, so be aware of how often you need to save the data to visualize the results in a good way. A benefit of saving the full result is of course that you can load in the result for a specific time step and analyze the solution.
- Saving selected parameters will store flow parameters for specific iterations. These flow parameters can be used to visualize with the tool called transient explorer described in the next paragraph. The selection of which parameters that are stored can modified, to only include the parameters you are interested in. Saving selected parameters will require less disc space than saving full results.
Which type of results to load
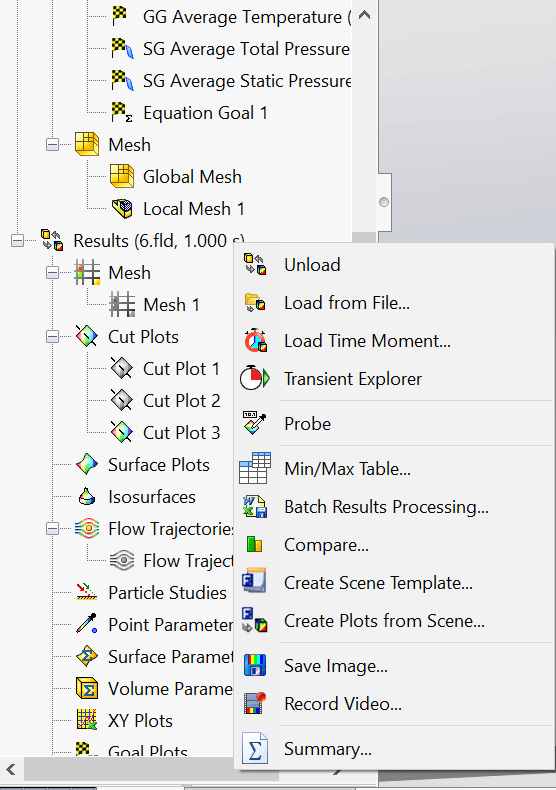
When you are loading results that are stored from the transient simulation you right-click on results and choose load. This will load the data stored in the last time step. You can now right-click on results again and load either transient explorer or load time moment, see picture below. Transient explorer will load in the selected parameters saved and interpolate solutions between the loaded iterations. A time axis will appear in the GUI, to be able to play animations of the post-processed data shown in the GUI.
Transient explorer
By using transient explorer together with the feature record video (shown in the picture above) the animation below was created. Showing how the heat transfer in the solid of the geometry over time. Note that the animation is smooth, due to the interpolation of data, even though the data is only stored at 10 different iterations.
Load time moment
If you choose to load time moment instead of transient explorer, you will load the full results. When loading the full results, you will have to choose which time step you want to load, I recommend you choosing the last time step saved. The full results will not be interpolated as in the case of transient explorer. This meaning that the animations you create will be only using data from the time step saved, so if you would like to obtain a smooth video, I suggest you saving data at least ten times per second of the video (the human eye reads approximate 25 pictures per second).
Two ways of entering animation mode
There is an embedded animation tool in Simcenter FloEFD, so you do not have to record the GUI when creating animations. You can enter the animation mode in two ways:
- Right-clicking on any post-processing, for example a cut plot, and choosing animation.
- Right-clicking directly on animations in the tree structure.
I recommend you using animation directly in the tree structure to get all animations located at the same place in the tree structure, making it easier to find your animations.
Animation mode – using the animation wizard
In the picture below you see how the GUI looks like when you are in animation mode.
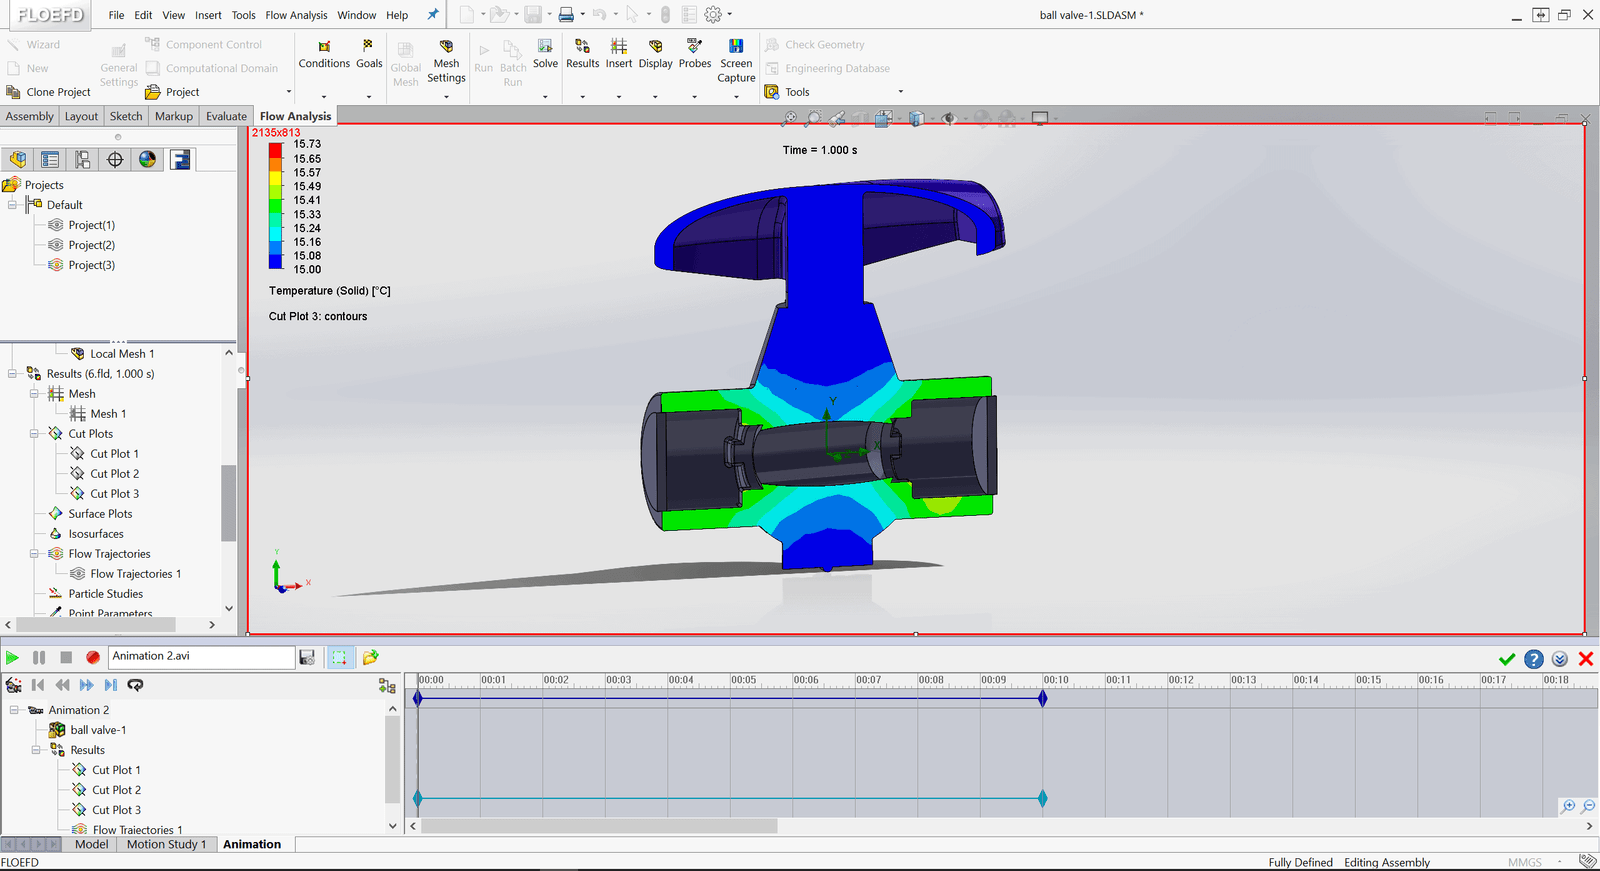
By clicking on the animation wizard you will have the possibility to set the settings for the animation. In the pop-up window for the animation wizard:
- Specify the length of the video in simulation time, and enable delete all existing tracks.
- Specify if you want rotation of your geometry in the animation (we will not use this feature in this example).
- Choose scenario to use data from several time steps, and not just the loaded time step.
- Choose the time step distribution in the animation, the default options are generally a good choice.
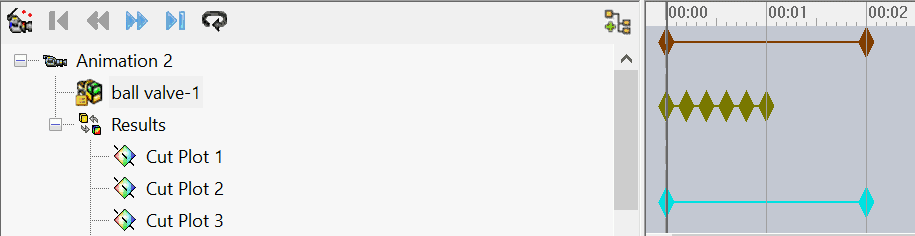
Visualized in the picture below, you will now get one timeline for the animation and one timeline for the results. If you hover over a timeline you will see which results in the animation tree structure is connected to this timeline, indicated by a grey box around the name of the results.
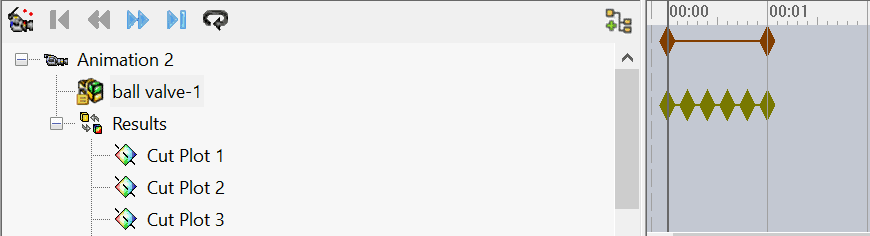
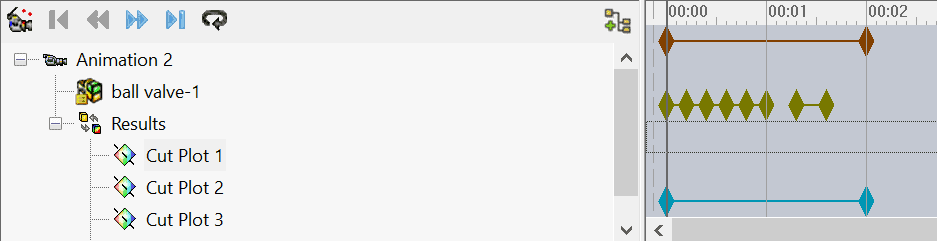
By right-clicking on the line belonging to cut plot 3 and insert control point, you will be able to able to create a time line for this post-processed data, visualized in the picture below. The upper timeline, corresponding to the whole animation file, should cover all the data included in the animation.
The results included from the animation wizard will not include the last time step calculated in the simulation. By inserting a control point manually in the line corresponding to the results, this time step will be included in the animation. If you loaded the last time step when selecting load time moment, this control point will automatically correspond to this time step, otherwise you can right-click in the control point and browse for the data from the last time step. In your Simcenter FloEFD folder created for the project, the folder .fld-file named as the folder of the results (usually a number) will contain the data of the last time step.
This will result in an animation as shown below.
We at Volupe wish you a nice weekend, and if there is nothing good on TV, you can always watch these animations of heat spreading in the solid of a ball valve handle as Friday night entertainment. If you want help to create animations like this or if you have other questions regarding your simulations, do not hesitate to contact us at support@volupe.com.
Note: I am using the stand alone version of Simcenter FloEFD<span data-contrast=”auto”>, if you are using another version the GUI might look a little bit different, but hopefully this blog post will still be helpful.