In this week’s Volupe blog we will look at a couple of useful tools when using the surface wrapper in Simcenter STAR-CCM+. The surface wrapper is a handy and versatile tool when you do not want to spend too much time preparing your geometry with manual work in your CAD software. This makes the wrapper a good option to capture your flow domain without spending too much time and effort on pre-processing.
Defeature We are going to look deeper into two features within the surface wrapper in this blog post – Contact prevention and Wrapper defeature. Both features are useful for when you have tight spaces or wedges between surfaces and want to either maintain detail or remove detail, without having to refine ad infinitum. The tools are useful as substitutions for refining to an unnecessarily fine level of detail.
The surface wrapper
A quick reminder of what the surface wrapper does. I usually look at the surface wrapper as the result of applying cling film or plastic wrap to an object. The level of detail is then corresponding to how carefully you perform this procedure.

Harmless prank wrapping car in cling film in Hornsby ends with laughs and puns for all | Daily Telegraph
The surface wrapper wraps the geometry of interest to create a volume that does NOT have intersecting surfaces or non-manifold edges. The surface wrapper can be used when parts are overlapping, have duplicate surfaces or when your input has to high level of detail. It provides a tessellated surface as in the below example. Note however that the result of the surface wrapper does not provide a good base for volume meshing, hence the surface re-mesher is necessary as well.

The surface wrapper has several tools, many of them similar to the automated mesh operations, with several custom controls, for surfaces, volumes and curves. Other than that, there is a gap closure tool and the possibility to do proximity refinements. Those will not be covered in this blog post though. This post will investigate the beforementioned tools that are specific to the surface wrapper.
Contact prevention
The contact prevention tool will, based on a value you set, make sure that contact between parts is avoided in the wrapper. Here I will use a simple example of a sphere inside a cube. The sphere is almost as big across as the cube, the cube has the side of 10 cm and the sphere has the diameter of 9.6 cm and is located in the middle of the cube. Meaning that there is no intersection between the sphere and the cube surfaces. The volume of interest for the wrapper will be calculated using a seed-point. A seed-point is a point located so that the wrapper has a place to start, and from that point it will wrap a volume. The geometry and the initial wrapper result can be seen below, when we are not using anything other that default settings for the wrapper and a base size of 0.5 cm.
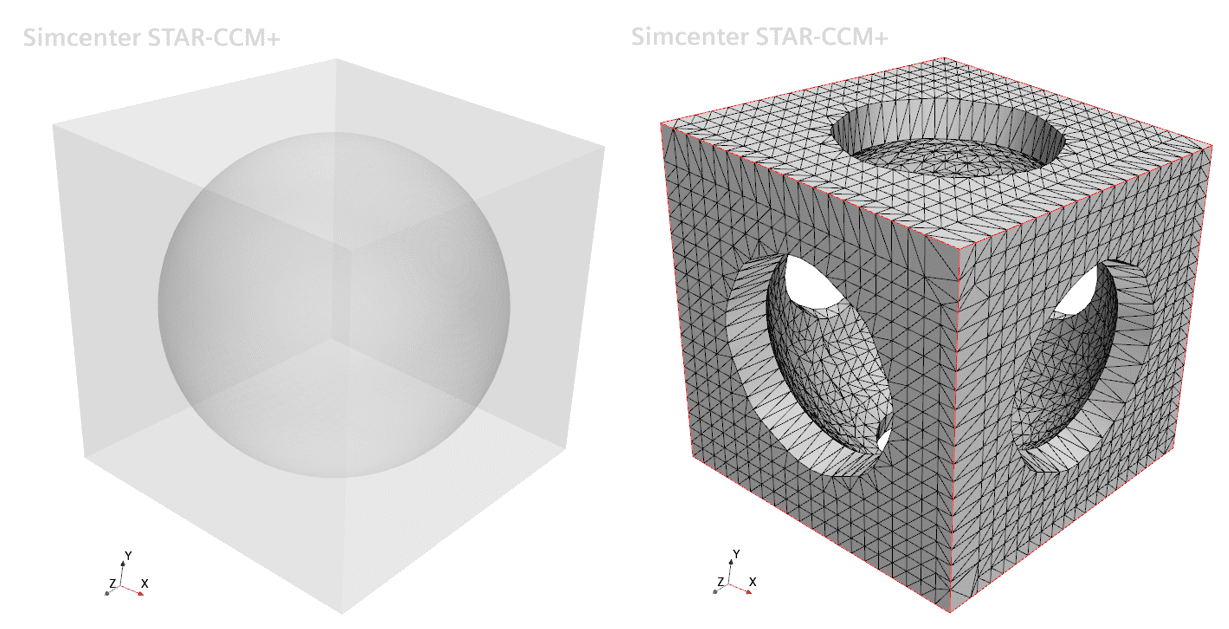
We can see clearly that the wrapper was unable to capture the full geometry due to the proximity between the sphere and the cube surfaces. From this point there are some options to use in terms of settings for the surface wrapper. You can either refine by reducing the base size or increasing the resolution of the surfaces. You can play around with proximity refinement, or you can do as this post suggests, and work with the contact prevention.
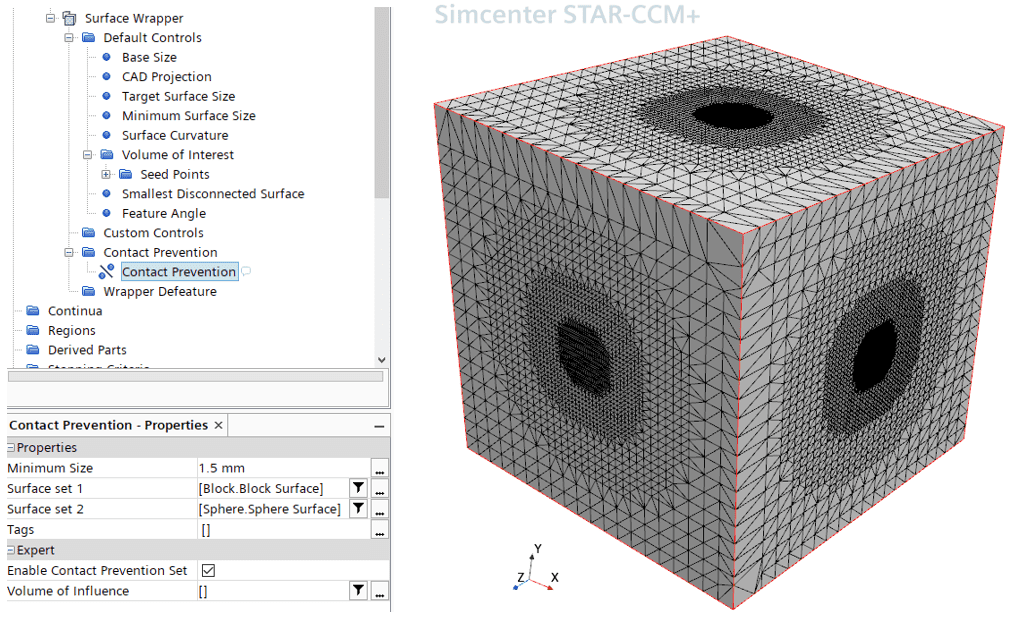
In our example here we create a two-group contact prevention where the cube is in one group and the sphere in the other. Note that for this case it would have worked with a one group contact prevention as well. The difference between a one and two group contact prevention is the number of different parts each part must be cross-referenced with to obtain the goal for the setting. The two-group contact prevention set saves time if you can sort your parts into two different groups. In this example the minimum size we allow for contact is 1.5 mm since we know that the smallest gap there is, has the value of 2 mm. That will essentially remove all contact between the parts. This can be seen then in the picture below, where we see progressively higher level refinement of the box surface as we go toward the smallest gap between the bodies.
Wrapper defeature
The wrapper defeature tool is what makes the surface wrapper remove a certain level of detail, or rather it helps you not retain features at a certain level. Meaning that if your geometry contains tight spaces or wedges, the wrapper defeature can help you crop those features. Let’s look at a simple example. The object can be seen below, and it is create especially because of its tight space. It is a saucer-like object with a diameter of approximately 25 cm and a total height of about 6 cm. The top and bottom parts are differentiated by different naming.

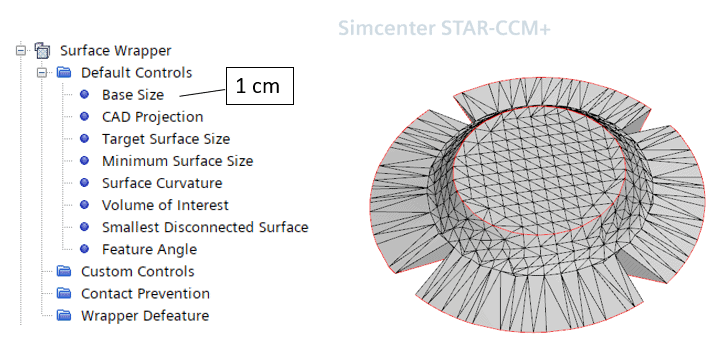
Our objective is to wrap the object. Even before we wrap, we realise that resolving those tight wedges can leave us with problems in later stages of our meshing process. It will be completely impossible to resolve any kind of prism-layers close to outer parts of the object. But let’s try to wrap the object using an internal wrap with the settings seen in the picture below, a 1 cm base size, and all other settings default. See also the result of the wrapper operation to the right.
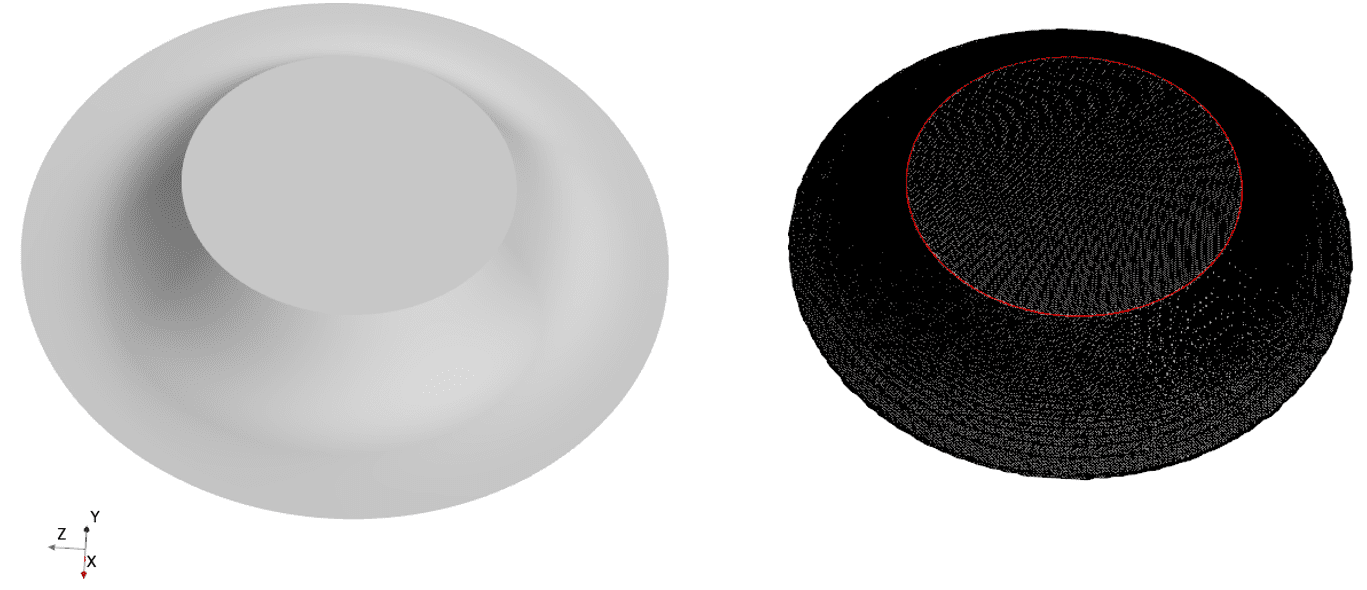
We see that this leaves us with both a poor representation of the part we wrapped, and a lot of the problematic wedges still there. So, let’s use the Wrapper defeature to see what the result will look like. Note that the wrapper also has the selection of one or two group controls. It will just like the contact prevention options cross reference between two groups or all parts selected for one group. Here we use a two group defeature control and select the top part in one group and the bottom part in the other group. In the picture below is both the original geometry and the result of the wrap for reference.
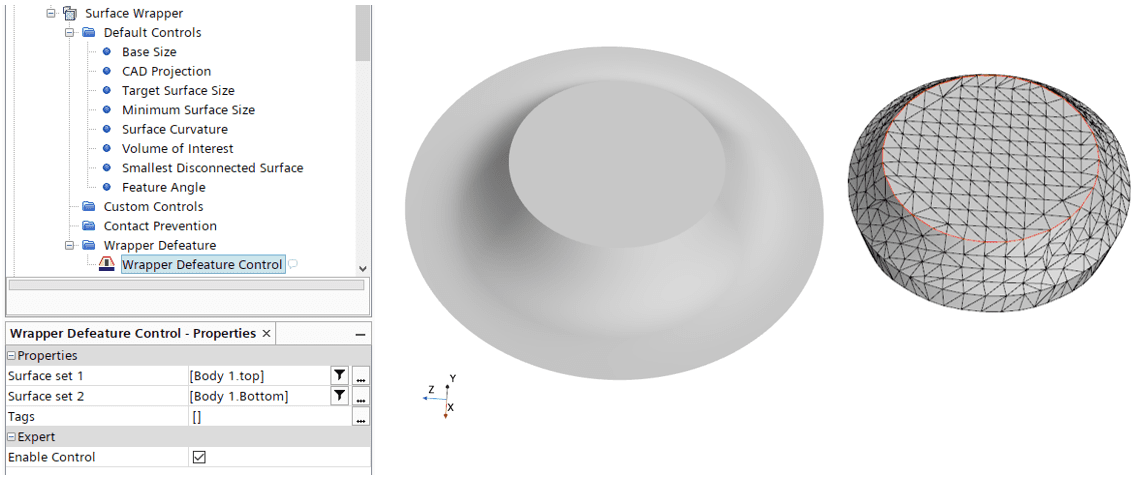
You can see that we have removed the wedges and the resulting geometry is well captured. Note also that the wrapper defeature control does not have a search-floor where you set the height of the defeature, it is rather based directly on the base size that you have selected for the wrapper. In the example above, the base size is the same as from when the wrapper defeature control was not used, namely 1 cm. The height of the “cut” created from the operation is about 2cm, twice the size off the base size.
You can of course change the base size and remove less total volume when using the feature. Below is an example where the base size is instead 1mm. This will then come at the cost of a longer wrapping time, especially if the majority of the settings are directly linked to the base size, and not set with absolute values.
I hope this has been useful and I really hope that you try these features in the wrapper, they can help you with both a speed up of the wrapping procedure, but also to create a computational domain that is of high quality without small wedges and other irregularities. And as usual, please reach out if you have any question to support@volupe.com.
Note also that we are currently in the progress of creating a 1-day course at Volupe for pre-processing and meshing, where these features and much more is included, so let us know if you would be interested in learning more about this topic.
Author

Robin Victor
+46731473121
support@volupe.com