Analyzing and communicating your simulation results is an important part of the simulation process. In this week’s blog post we will show how you can use annotations to improve the post-processing of your work. Annotations are objects that you add to scenes in order to provide extra information or visualization within the same window. For example, you can show the current solution time in a scalar scene or include a value from a report. Possible annotations in Simcenter STAR-CCM+ include report values, images and embedded versions of plots or even other scenes.
Creating an annotation
Adding an annotation to a scene is a multi-step process. First, you create an entity of interest for the simulation, e.g. a report or a scene. Secondly, you use this entity as a “template” for the annotation that will be stored in Tools -> Annotations. Thirdly, you add the annotation to a plot or a scene. For a scene, the annotations are found under <NameOfScene> -> Attributes -> Annotations. For a plot they are found under Annotations. It is also possible to drag-and-drop annotations from Tools -> Annotations directly into scenes.
Once an applied annotation is in a scene or plot, it can only be changed by modifications to its own properties. If you edit the original template annotation subsequently, it does not affect the applied annotation. The exception is the text content of a simple text annotation, which can only be edited from the template.
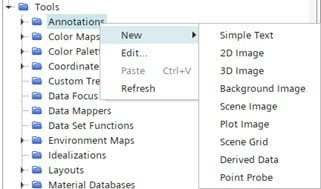
To create an annotation you right-click Tools -> Annotations (as seen below) and select the annotation of choice. Alternatively, you can right-click the entity of choice (e.g. a scene or a plot) and select “Create … Annotation”. This will populate the Tools -> Annotations folder with an annotation template that you can use in a scene or plot.
Annotation types
Some annotations are pre-defined by default in STAR-CCM+. These are
- Iteration
- Time Step
- Solution Time
- The Simcenter STAR-CCM+ Logo
- Scene (contains information about the sim-file)
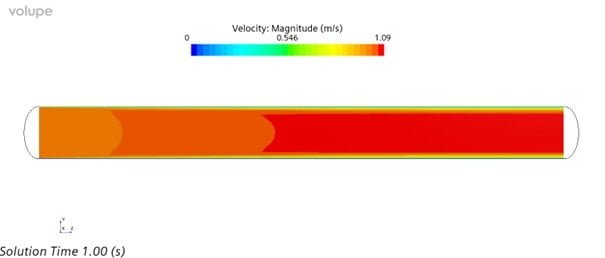
You do not need to create these annotations, they are readily available for use in any scene for all simulations. The Simcenter STAR-CCM+ Logo is always included by default when you create a scene, while the others are not. The Time Step or Solution Time annotations can be very useful to add in transient simulations when tracking the solution progression, or when creating animations. The Iteration annotation can be used in a similar fashion when tracking the progression for a steady-state simulation for example. The picture below shows an example of what the Solution Time annotation can look like.
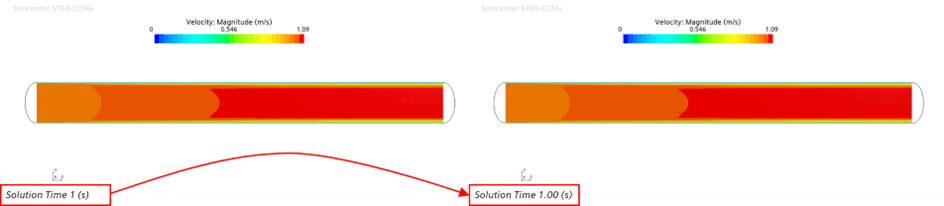
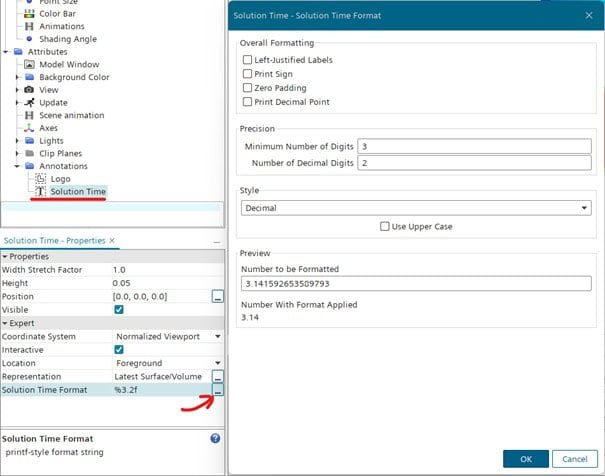
By default, the annotation format adapts to the instantaneous value (e.g. 1 s), but sometimes it may be desired to maintain a fixed format for the annotation (e.g. 1.00 s). This can be handled through the annotation properties (see picture below).
It could be interesting to know that you could actually replace the Simcenter STAR-CCM+ logotype with another one. To do so, you go to
Tools -> Annotations -> Logo and in the properties for that annotation you browse for another image source for the logotype.
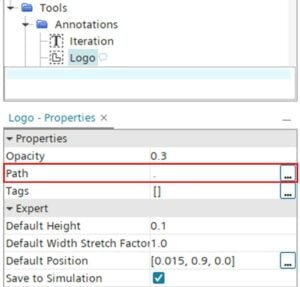
Below you see an example where I replaced the default logo with the Volupe logotype (upper left corner).
Other annotations need to be created by the user, and the following types are available:
- Background image
- 2D image
- 3D image
- Plot image
- Scene image
- Point probe
- Report
- Simple text
- Scene grid
- Derived data
Background, 2D and 3D image annotations let you import images or graphics into your scenes. A Background image annotation is simply a background image replacing the default white background in a scene. A 2D image annotation is similar to a background image annotation, but with a few more options (e.g. positioning and sizing). The picture below shows an example where I put an image of a water surface as a background annotation, accompanied by our old rubber duck companion.

A 3D image annotation lets you adjust the alignment of the image in space, allowing for a more precise positioning relative to your geometry. Below you can see an example where I placed the rubber duck relative to a 3D image annotation instead.

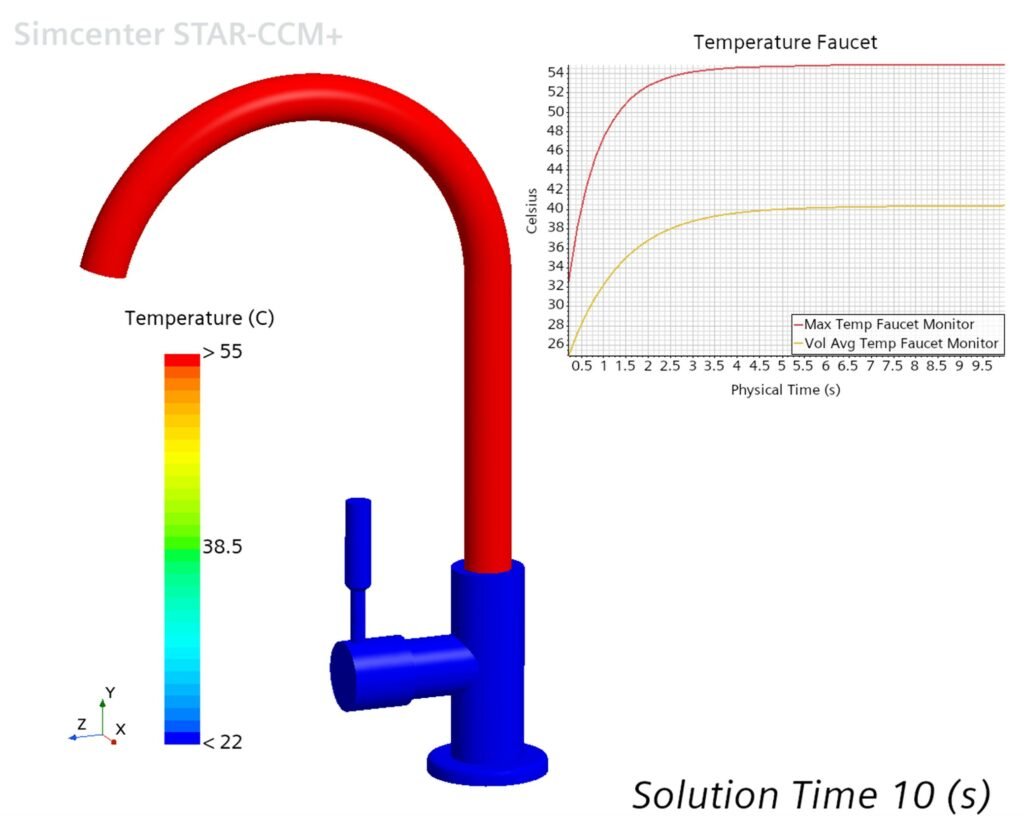
Plot image and Scene image annotations allow for placing copies of plots or scenes into other scenes. This can be an effective way of tracking solution progression in the same scene. Below is an example from a heat-up simulation of a kitchen faucet, where a temperature plot has been included as a Plot image annotation.
Point probe annotations can be used to highlight probe values at specific locations in a scene. One probe point annotation can include several probe point derived parts, so that you can easily modify the annotation for several points at once (e.g. change the field function to be displayed). Below is an example from a race car rear wing displaying the pressure coefficient at different locations.
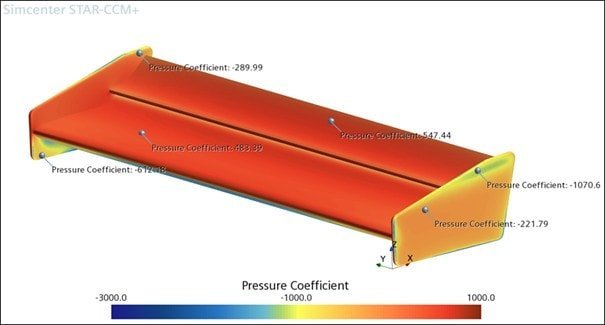
The point probe annotation was introduced as a new feature in version 2022.1 and my colleague Florian wrote a short segment on this when it was released (Simcenter STAR-CCM+ version 2022.1 news part 3 – Marine application – VOLUPE Software).
Report annotations are used to display report values alongside graphical displayers in a scene (see example below).
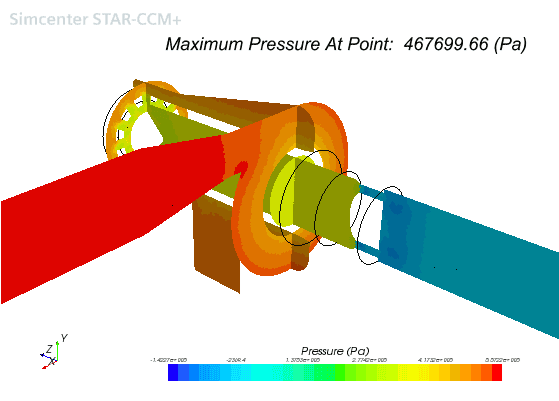
The Report annotation is displayed in the form <Report Name>: <Report Value> (<Unit>). In some cases you might want to display only the report value itself. In such a case, you can make use of a Simple text annotation, which allows you to insert only a report value as a string. You may also incorporate any text string alongside the report value if you wish. What you need to do is to find the field function name reference for the report (browse through Automation -> Field Functions) and then call for that report value using a dollar sign prefix ($), see example below.

A Scene grid annotation allows you to put a reference grid onto your scene (see below). It can be a useful tool for analyzing and looking for reference points in a geometry.

Lastly, Derived data annotations are used to display data associated with data set functions.
I hope this blog post was helpful to show how you can work with annotations to improve your post-processing in Simcenter STAR-CCM+. As always you are welcome to send any questions or comments to support@volupe.com.
Author

Johan Bernander, M.Sc.
support@volupe.com
+46 702 95 18 31