It is approaching five years since this blog introduced advanced rendering to our readers [Advanced Rendering In Simcenter Star-CCM+ – Volupe.com]. A lot has happened since then. For that reason, I will provide Part 2 of this series, that has some updated and more detailed information on how to use advanced rendering – to get the best effect on your post processing images.
I will stepwise go over the creation of an advanced rendering scene, from importing a .step-file, how to manipulate the input and go on to creating an advanced rendering scene.
Importing CAD
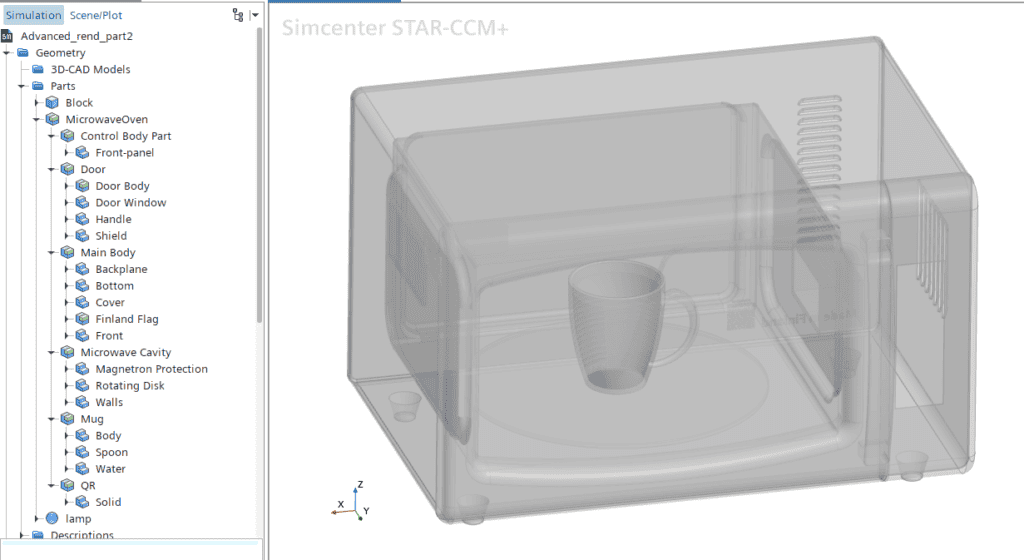
I have acquired a CAD of microwave oven from an open source community called GRABCAD [GrabCAD Community Members | Engineers & Designers]. GRABCAD has everything you can imagine in terms of CAD. In this case the file is a STEP file, and it has a god assembly split for me to apply different setting to the constituent parts in my scene. The level of detail to the CAD is important if you want a vivid picture with many small details. The picture below shows the default scene and the different parts that we can work with, named in a logical sense. We have a microwave oven with a cup of liquid together with a spoon inside. (Don’t use a metal spoon in the microwave in reality)
Different displayers
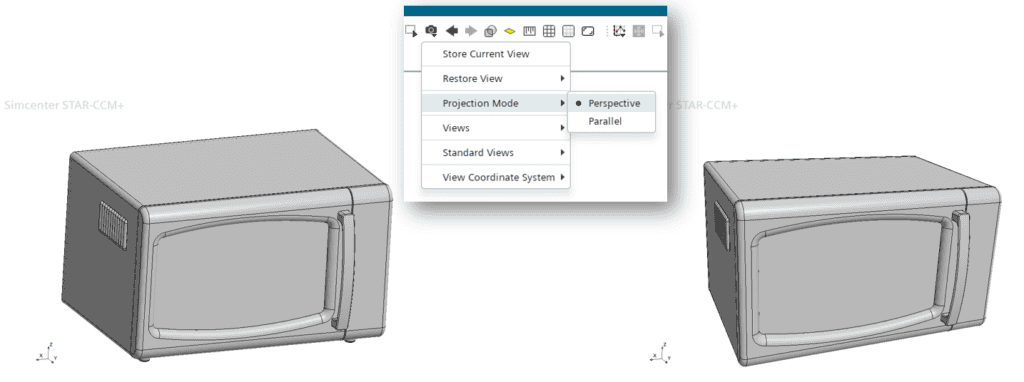
Before we even go to using advanced rendering, it is a good idea to consider what details we want to separate from each other in the scene. We do this by applying different displayers in a new scene. The first change we do in creating something that approached photo realism is to change the projection mode from parallel to perspective. Seeing as we perceive our surroundings in a perspective, it makes the most sense to do this if our goal is photo realism.
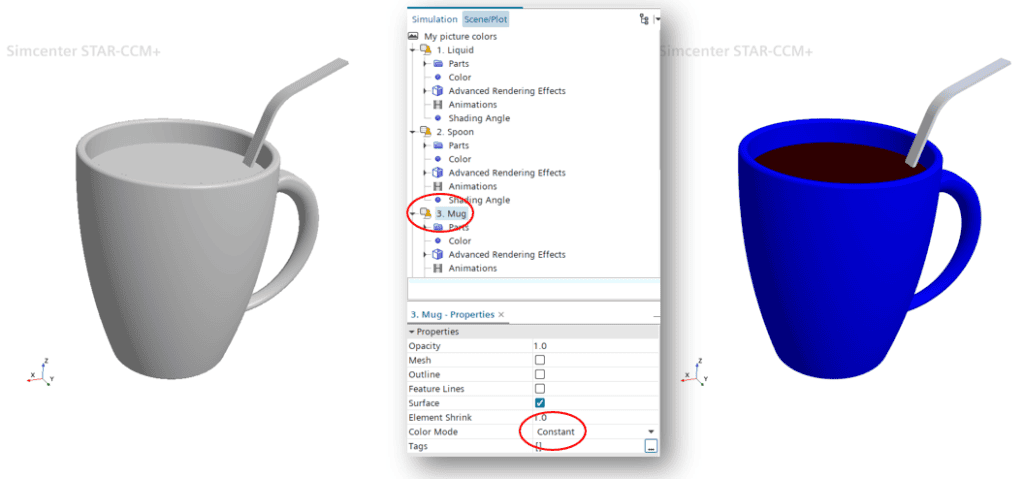
We are going to do this in sequences so as not to be overwhelmed initially. The first three different displayers are the liquid, the spoon, and the mug. It is a good place to start, and we will the “build” the microwave oven around that. Let’s say we want the mug to be made out of a blue metallic material, the spoon is metallic, and the liquid is brown (coffee). To get these effects, a metallic mug, a metallic spoon and a body of liquid like coffee, before we go to advanced rendering, we can utilize different colors to create something like this. By setting the color mode to constant, selecting an appropriate color we can create something approaching what we want. But to be honest, the result is rather underwhelming, cartoonish.
It is time to activate the advanced rendering. In doing so, initially not much happens. It is when we start using the effects that we get some nice-looking pictures. The quality of the picture is important, but while working against our end goal we turn it down, in order for the rendering process to be sped up. Only the final, exported result need high quality. When we improve the result using advanced rendering, we can utilize either an effect on a color, or a preset material, where settings are already made. For the liquid, we select here the color in the color palette (burnt umber) and apply the metallic material to it. We then increase the Clearcoat IOR (Index of refraction) to 1.5 from 1, in order for the surface to get a more metallic appearance. Both for the spoon and the mug, we apply the color selection of preset material instead and select from the list of predefined materials, for the spoon we use “Metallic Light Grey Clearcoat”, and the mug uses “Metallic Blue Clearcoat”. The picture is exported with 0.8 quality and noise reduction of 0.1. The noise reduction removes some of the graininess in the picture.

This looks better and much more photorealistic than what we had before. Note that a white background is not the most forgiving option we have. But since we are “building” a microwave oven around the mug, we will leave that for now.
The full image
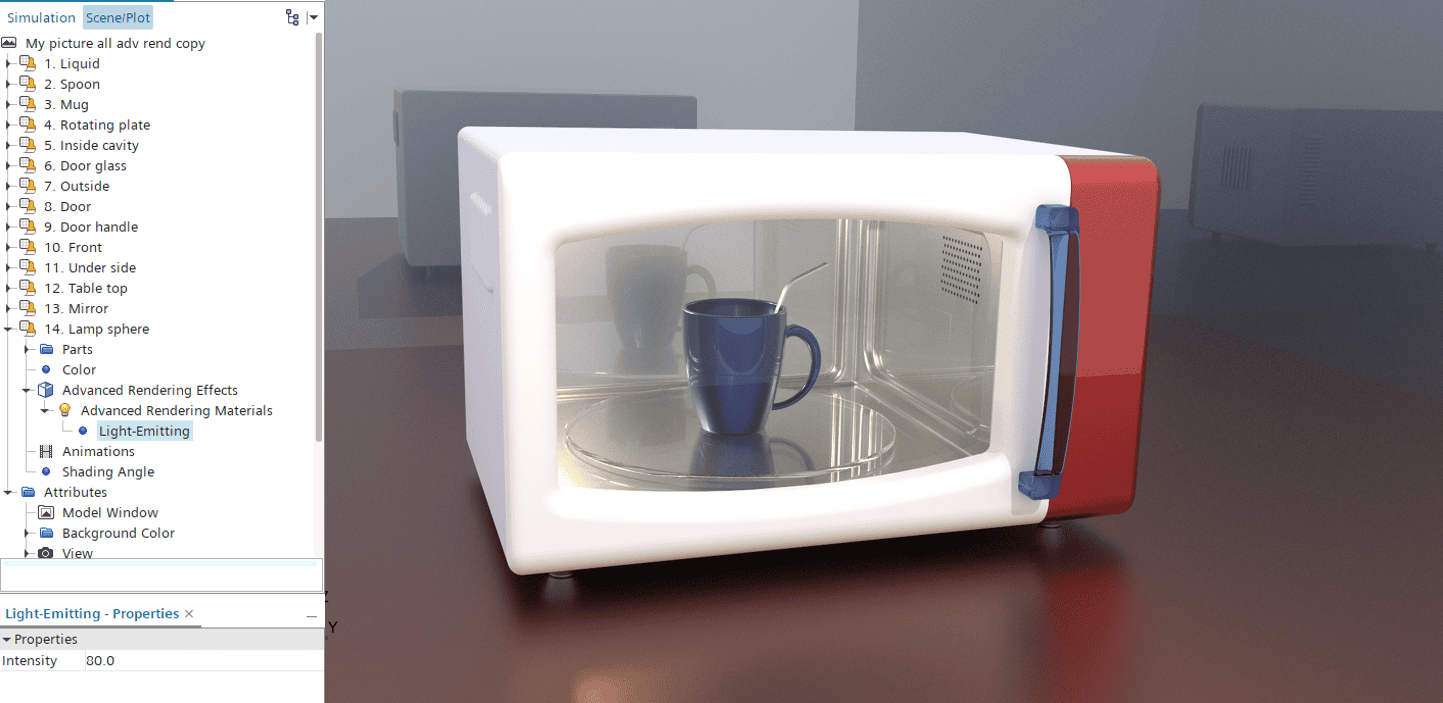
Now it is time to do the same thing but on a larger scale, to include the full microwave oven. Additionally, I added a box that represents a tabletop and surrounding walls that work as mirrors to fill the scene and not have any empty background in the picture. We will not look at all the details of every displayer, but the number of different displayers is shown in the picture, as well as the quality used to generate it.
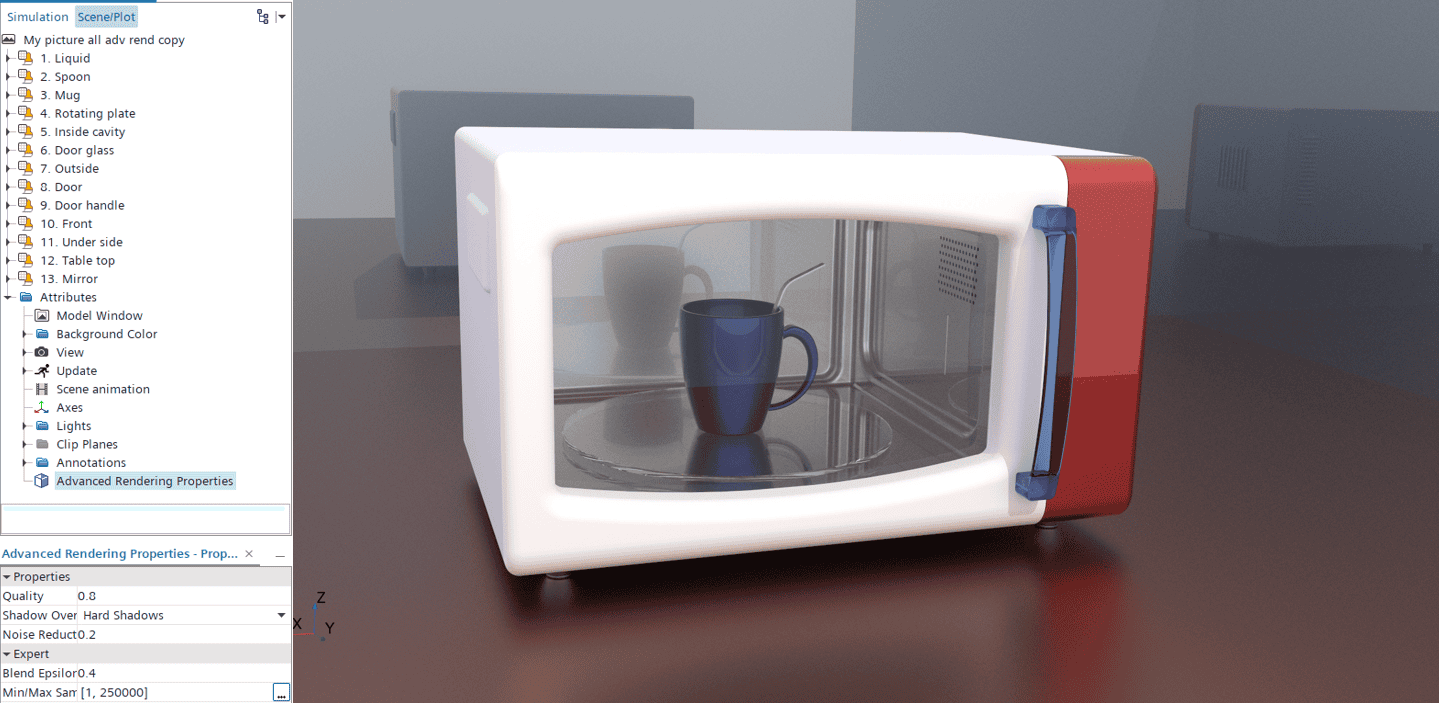
A microwave typically lights up when we start it, and this effect is possible to include as well. By creating a small sphere that is around 1.5 cm in diameter and locate that in the top-left corner, close to the back wall, we can add another displayer with light emitting properties and decide the intensity of the light to create a lit-up microwave effect. It should be noted that this rendering-process is extremely computationally heavy, and it takes a lot of time to render these types of pictures with high quality. While the picture above is projected by Simcenter STAR-CCM+ to take 17 minutes, the below picture including the yellow light, is estimated to take just above 4 hours to generate, saving it in HD (1980 x 1080).
I hope this has been useful to you and given some ideas on how to use advanced rendering. If you have any questions on the topic, please reach out to support@volupe.com. Note also that we provide a half day course in advanced post-processing, working with advanced rendering, resampled volumes, and screenplay, among other things. [Advanced Post-Processing Training – STAR-CCM+ – Volupe]
Author

Robin Victor
+46731473121
support@volupe.com