There is a new sheriff in town! Studio scenes! At least when it comes to photorealistic rendering in Simcenter STAR-CCM+. I have earlier posted about advanced rendering in our blog, and here are the links to those posts: Advanced Rendering In Simcenter Star-CCM+ – Volupe.com, Advanced Rendering In Simcenter STAR-CCM+ Part2 – Volupe.com. The advanced rendering is still possible to use in Simcenter STAR-CCM+, but the studio scenes proved a lot more speed when it comes to rendering.
The studio scenes were introduced in version 2506, almost a year ago. The reason why studio scenes are potentially faster is the fact that they work on GPU. For this reason, there are some technical requirements for your hardware. You must use a modern GPU with ray tracing capabilities. The GPU and driver must support Vulkan 1.3 and the Vulcan ray tracing extensions. See the documentation for further details and differences between Windows and Linux. Note also that the amount of geometry that can be rendered in a studio scene is limited by the available GPU memory. When the system running the renderer does not fulfil the requirements, a warning triangle is shown on the studio scene, and a message appears in the console. The scene display appears empty in this case.
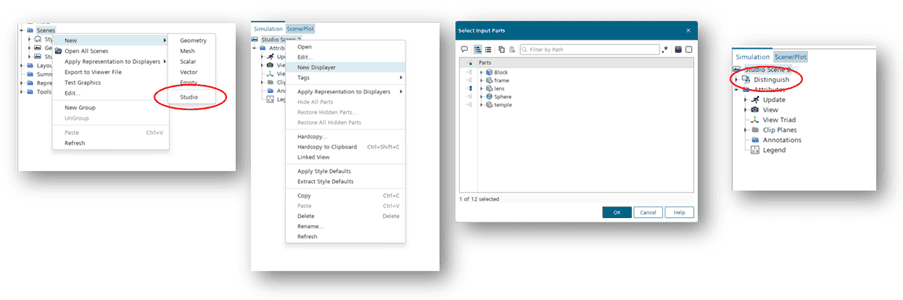
The clip below gives a very short introduction to how studio scenes work. In a regular scene, we use displayers, but in studio scenes we use distinguishes.
To reiterate the selection when it comes to the displayer type in the studio scenes, they are referred to as distinguish. You create a studio scene similar to how you usually create a scene. You then create a new displayer och with that, what part you want to be visible in the displayer. That displayer is then shown as a distinguish.
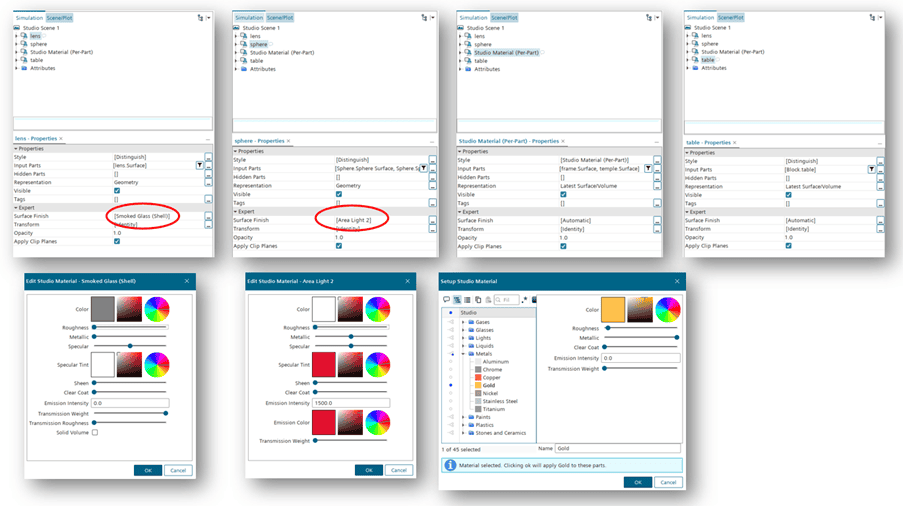
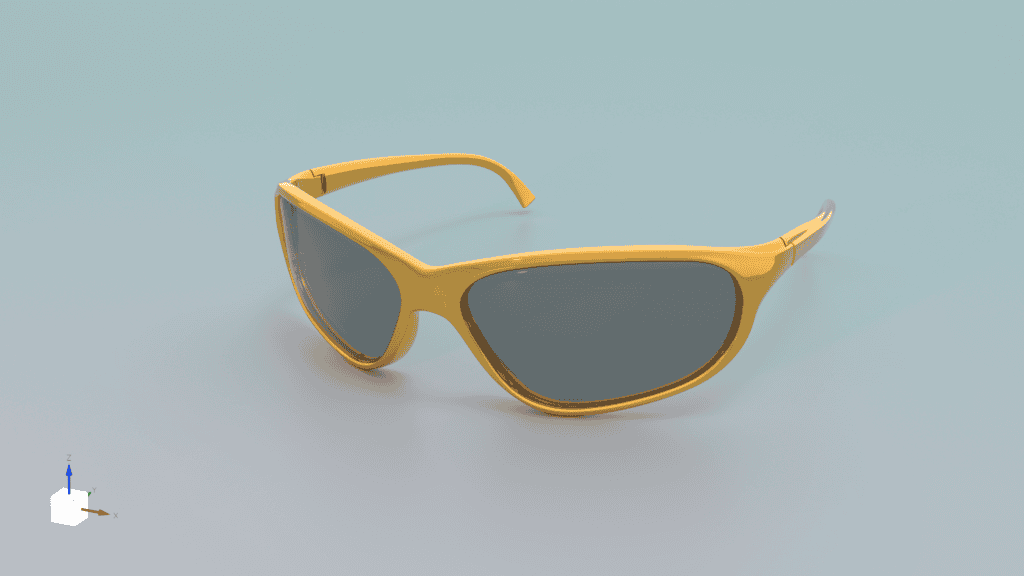
In the example below, the sunglasses, we use a predefined material called “Smoked glass (Shell)” setting. As with advanced rendering, there are several predefined materials you can select between. Those options can be found under Tools à Rendering Materials à Studio. In front of the sunglasses is a sphere acting as a light emitter with high intensity. The emitter has a specular red tint that can be seen in the scene. When self-creating a rendering material, you start with one already available and alter it to your needs and deepest desires. You have then created a copy of it that can be selected and renamed. The glasses frame uses the style “Studio Material”, which in this case has the predefined option of golden metallic. The “table” here uses a default setting, like “Distinguish Inputs” in the colour management of a displayer.
The above selection gives the results below. Is it something you would wear? Perhaps in 1997!
Compare to advanced rendering
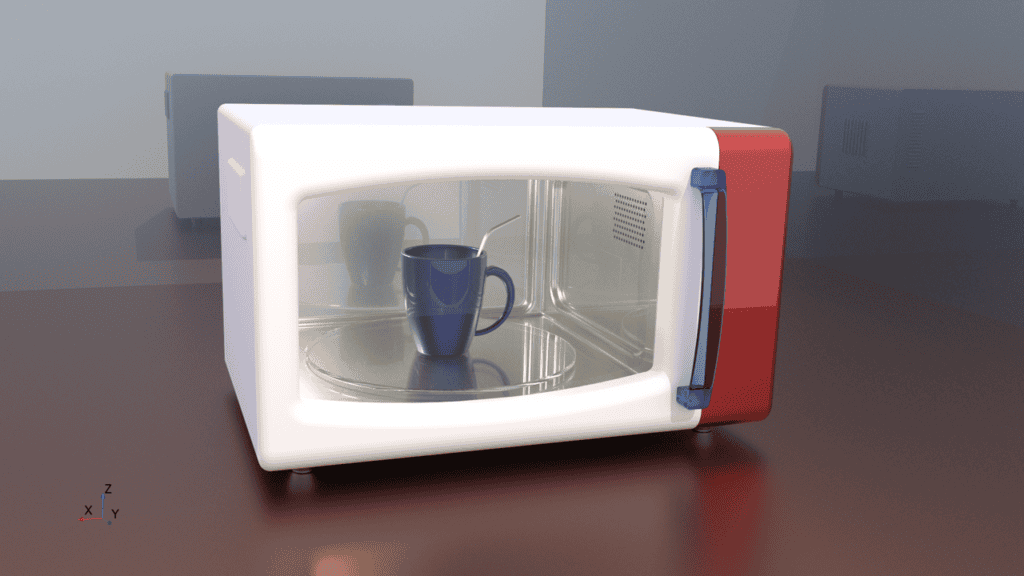
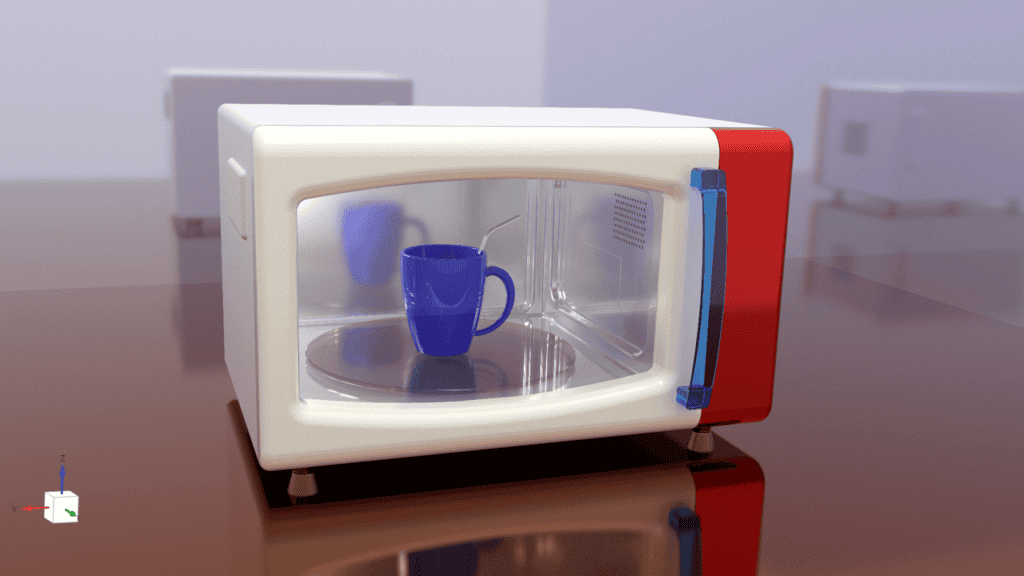
Below are two different pictures, the upper one is created using advanced rendering, and the lower one is created in a studio scene. In both cases, there is a part in the upper left inner corner that has light-emitting properties. If you in your scene have an object with that type of effect, the rendering will take a lot longer, both for advanced rendering and in a studio scene. The upper picture using advanced rendering took about 4 hours to render fully, while the studio scene took about 20 minutes on the same system.
Screenplay
It is of course possible to utilize screenplay as well using studio scenes to create photorealistic animations. And here is where you can really save some time, since the rendering is a lot faster. The studio scenes actually provide a real option to use screenplay in your daily work, and not only on very special occasions. You can now create the animation in a fraction of the time. As an example, here, we revisit our old friend the Range Rover, a staple object almost as popular in this blog as the rubber duck.
I hope this potpourri of pictures gives you the courage to test this new feature out in Simcenter STAR-CCM+ and that you find how easy it is to use, and more importantly how fast the rendering is, provided that your system meets the requirements. Any questions can be sent to support@volupe.com.
Author

Robin Victor
support@volupe.com