Solar Radiation Modelling in Simcenter STAR-CCM+

Randi FranzkeApplication Specialist
In short
If you want to include solar radiation, this post will help you pick the right models for your problem and make sure the sun is hitting your geometry from the correct direction.
As the days on the northern hemisphere start to become notably shorter and darker, let’s bring the sun back and look at how you can include solar radiation in Simcenter STAR-CCM+.
Simcenter STAR-CCM+ has thermal radiation modelling capabilities that are vast and useful for a wide range of applications, from simple conjugated heat transfer analysis to thermal comfort and combustion and particle simulations.
In this blog article, we’ll focus purely on solar radiation, investigate the physical aspects of solar radiation, explain the solar load calculator, and discuss the available physics models that can be used.
What is solar radiation and where does it come from?
Solar radiation consists of two parts: Direct and diffuse solar radiation. As the naming suggests, direct solar radiation occurs when a surface is exposed to direct sunlight. Diffuse solar radiation on the other hand is the sunlight that has been scattered by the atmosphere and clouds, which is therefore a non-directed contribution of solar radiation.
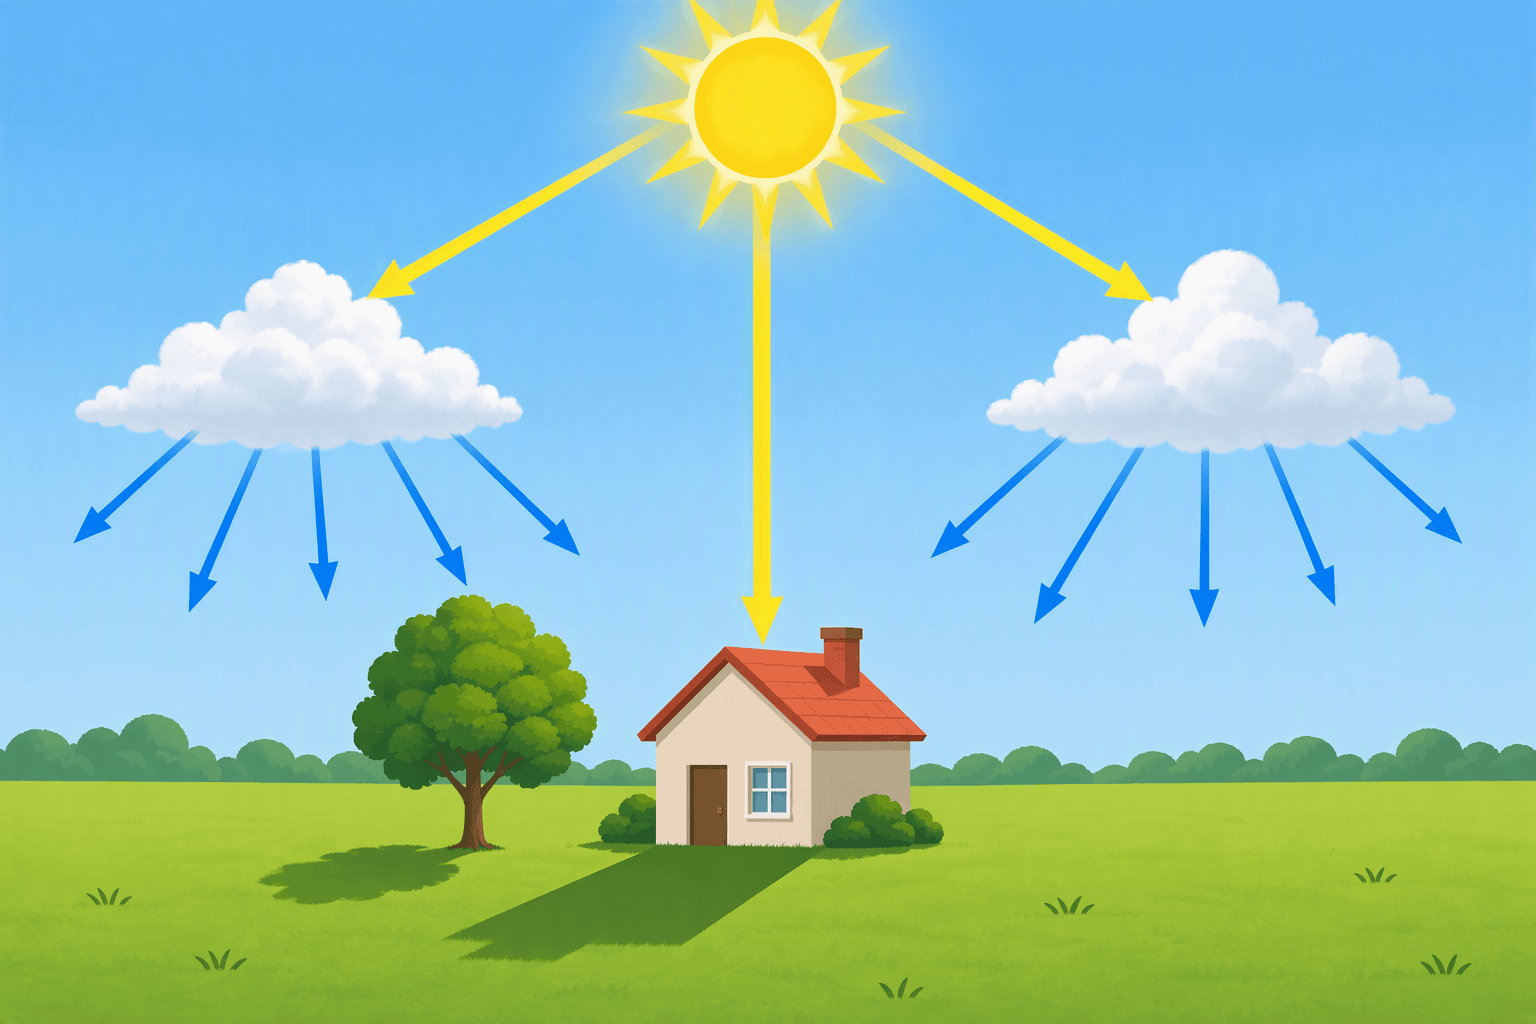
Figure 1: Direct (yellow) vs. Diffuse (blue) solar radiation
When it comes to including diffuse radiation, it is important to know that Simcenter STAR-CCM+ does not assume or automatically include any horizon in the simulation. This means that the diffuse solar radiation is coming from a black body that is located all around your simulation objects, i.e. the complete sphere, illustrated in Figure 2.
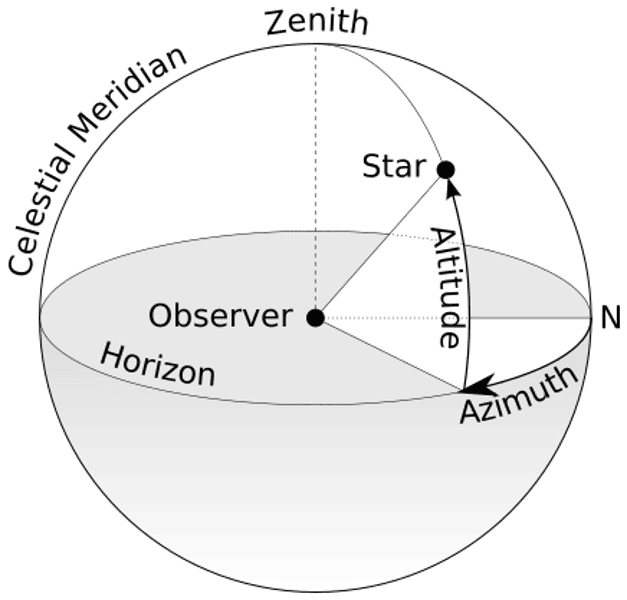
Figure 2: The sun’s (“Star”) position relative to the origin (“Observer”)
In Figure 3 and 4, we simulated the same solar conditions, once with and once without modelling the ground surface. In this example, the direct solar radiation is unchanged: its direction is set by the sun’s position, expressed through the azimuthal and altitudinal angles in Figure 2. The difference is in the diffuse component. With the ground included, the vertical surfaces of the simulated cube only receive half the diffuse radiation, due to them being exposed to diffuse radiation coming from the half-sphere above the horizon. To reproduce this blockage, the ground must be sufficiently large to block the view between the object’s surfaces and the surrounding black body.
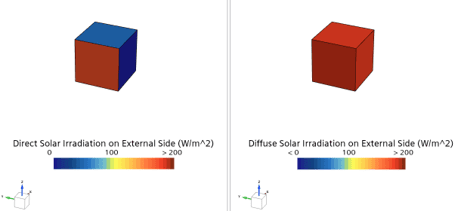
Figure 3: Without ground simulation
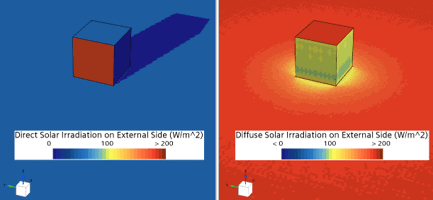
Figure 4: Ground included in simulation
The Solar Load Calculator
To specify the sun’s position for your simulation, you need its azimuthal and altitudinal angles relative to your origin. Determining these angles can be difficult when the sun is not directly overhead.
Simcenter STAR-CCM+ includes a Solar Load Calculator, which makes this task much easier. Select “Solar Loads” in your physics models to activate it, then enter the date, time and geographic location. The calculator uses these inputs to determine the sun’s position for your simulation.
In the expert properties you can specify the amount of diffuse radiation and a “Sunshine Factor”, representing your atmospheric conditions. There are several models available online that can be used as guidance for those two parameters, e.g. the Bird model for a clear sky, presented by Richard Bird (link). It is worth noticing that even with a clear sky, the Sunshine Factor often ends up below 1, due to pollution and atmospheric effects.
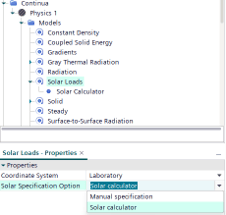
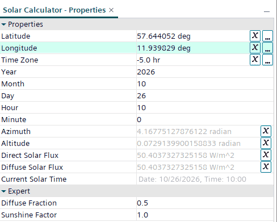
Figure 5: Solar Load Calculator
So which models do I need to chose?
Now that we have gone through the geometrical restrictions and set up our sun itself, let’s have a brief look at the remaining radiation physics models that are not specific to solar radiation, but necessary to make your simulation succeed.
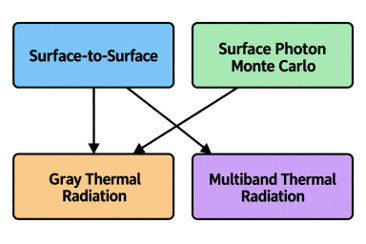
Because solar radiation acts on exposed surfaces, usually a surface radiation model is the first choice: Surface-to-Surface (S2S) or Surface Photon Monte Carlo (SPMC). S2S calculates the solar load on each cell surface using view factors, which describe how much of the surface is visible from the radiation source—the sun. For stationary geometry, these factors need to be computed only once, making S2S computationally efficient. SPMC instead solves the Radiative Transfer Equation statistically through ray tracing. With enough photon bundles, it offers higher accuracy than S2S and includes refraction. This comes at a computational cost: the ray tracing usually needs to be updated during the simulation, making SPMC much more expensive than S2S. However, if you expect a significant change of your radiation parameters through a volume, you can combine the SPMC with a Volumetric Photon Monte Carlo model in a region. If you want to read up more on how to combine surface and volumetric radiation models, there’s an example here.
Next, you need to pick a radiation spectrum compatible with your surface radiation model. If you picked S2S radiation in the previous step, you can choose between Gray Thermal Radiation and Multiband Thermal Radiation. For SPMC the only choice is Gray Thermal Radiation. Gray Thermal Radiation treats the radiation properties in the continua as independent of the wavelength. The Multiband Thermal Radiation model is useful when you have different sources of thermal radiation that you want to separate, e.g. solar radiation and some long-wavelength thermal radiation.
Summary
Setting up a simulation model including solar radiation consists of three main points:
- Specifying the correct solar loads (e.g. with help of the built-in calculator)
- If diffuse solar radiation is included, make sure to include a sufficiently large ground surface to mimic the horizon
- Pick relevant surface radiation models for all participating continua so that those surfaces contribute to the radiation calculation.
We hope that this provides you with a good foundation to set up your simulations with solar radiation. If you have any more questions, please reach out to us at support@volupe.com .
